Hi! Most likely you’ve arrived here because you want to know how to easily sell your photos and videos online. At picsel, we believe it should be very simple so you can put all your focus on your audiovisual content and not on the sales process. I’ll show you how to do it in 5 steps:
Step 1: Create an account on picsel
To create your account, it’s as simple as clicking on “I’m a photographer” in the upper right corner. We directly use your Google account so you don’t have to worry about creating a username and password. You’ll need to log in with Google and then you’ll be ready for the next step.
![]()
Step 2: Link a payment method
The next step is to link a payment method. To do this, you need to go to your profile editing page.
Once there, you just need to click on the button to connect your preferred payment method. This will take you to the payment provider to authorize picsel and complete the setup.
Setting up Mercado Pago (only available in Argentina)
Setting up Mercado Pago allows Argentine photographers to receive payments directly in their account. The picsel commission will be deducted from each payment.
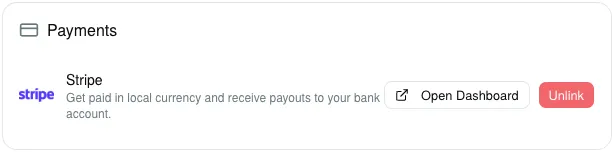
Setting up Stripe (available globally)
Stripe allows you to set up a bank account to receive payments directly there. With Stripe, you can also charge international clients without any issues. The Stripe option is available for all photographers globally. Once you make a sale, the payment will be pending for a period of 3 days, and you can see it on your sales page, along with pending payments to be settled.
Once we send the money to Stripe, you’ll see it credited in your Stripe dashboard, along with the actual payment date when Stripe deposits the money.
To use Stripe, we use an international payment processor that, depending on the country and payment method, charges a percentage of the transaction. We call this charge the Processing Fee and you can see it in the sales details. Before sending the money to Stripe, we deduct the picsel commission (if applicable) and the processing cost.
Complete your profile
Once this is done, you’ll return to your profile page. It’s a good time to choose a username you like, along with a good description for your profile, link your social media accounts, and why not, change your profile picture. Then, you can access your profile using the username you chose. For example, for my username “manuponsa”, my profile page has the address: https://picsel.app/u/manuponsa or https://manuponsa.picsel.app.
Step 3: Creating your first album
Once your profile is ready, all that’s left is to upload your first content. To do this, click on the “Create album” button next to your profile picture. In this step, you’ll need to define the basic properties of your album: a title, description, the price for each photo or video, a reference date for the album, and a cover image.
I’m going to choose some surfing photos and videos from Peru.
 You can also go to the discounts and packages page to set up quantity discounts if you want to offer them.
Lastly, you can add collaborators to your albums if you wish. A collaborator will be able to upload photos to the album they have permissions for. We explain how it works in detail in this post.
You can also go to the discounts and packages page to set up quantity discounts if you want to offer them.
Lastly, you can add collaborators to your albums if you wish. A collaborator will be able to upload photos to the album they have permissions for. We explain how it works in detail in this post.

Auto-publish
If you leave the auto-publish button selected, as you upload photos or videos the album will be available for your clients to view. Otherwise, you can publish it manually from the album page.
Step 4: Upload your content
Once you’ve created the album, you’re ready to upload your photos and videos. To upload them, you need to click the “Upload photos or videos” button.
 When you click “Upload photos or videos”, the next step is to click on the container with the message “Click to choose files to upload”. This will let you select the photos and videos you want. Once you’ve selected the files, you’ll be able to see the size of each one. When you’re ready, click the upload button to start the upload.
 Please don’t leave the page or put your computer to sleep while uploading, otherwise you risk the files not being uploaded properly. Once it’s done, you’ll return to the album page and see the processed files. Sometimes, some files may take longer to process. In that case, you’ll see a banner on the page mentioning it.
Step 5: Share your album
Congratulations! You’ve uploaded your content. Once it has been processed correctly, you’ll receive an email to your account letting you know that your album is ready to share. When you return to the album page, you’ll see all the photos and videos with their respective watermarks. Also, if you go to the main picsel albums page, you’ll be able to see your published album.
 Now all that’s left is to share your profile or album page with your clients so they can buy the photos and videos they like. Picsel only charges a 10% commission on each sale you make through the platform.
Conclusion
Done! You can now sell your content on picsel. Remember you can follow us on Instagram and write to us if you have any questions.